-
Canon 5D Mark III
The 5D Mark III, like most DSLRs, has auto exposure bracketing (AEB), allowing multiple shots to be taken automatically with different exposures, so they can be combined into an HDR image. As with many newer cameras, it is also capable of combining these images internally, to produce one blended image without using external software.
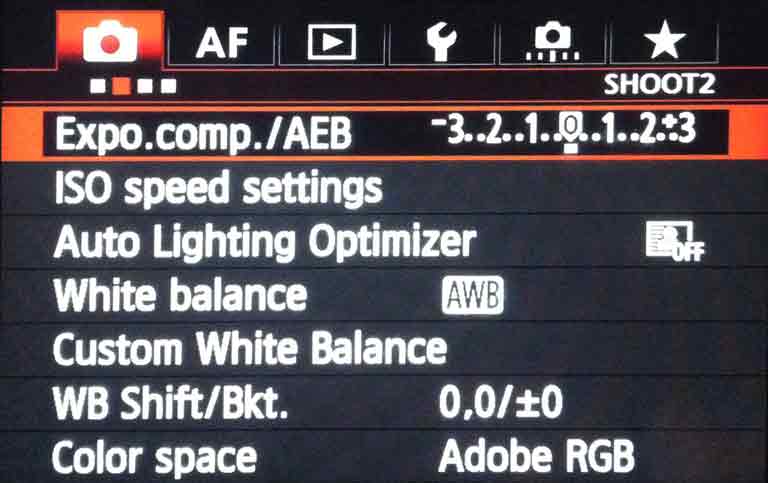
Auto Exposure Bracketing
Due to the large number of menu options on this camera, each menu page has now been divided up into sub-pages. The AEB options are on the second sub-page of the Shooting page:
The camera offers a generous range of EV spacing: up to +/- 3EV per shot, in either ½ or 1/3 EV increments, though we recommend no greater than 2EV for good HDR results. Within the AEB menu, the exposure compensation of each shot is highlighted. Both the spacing and centre point can be changed here, using the front and rear dials respectively, and confirming by pressing the “OK” button.
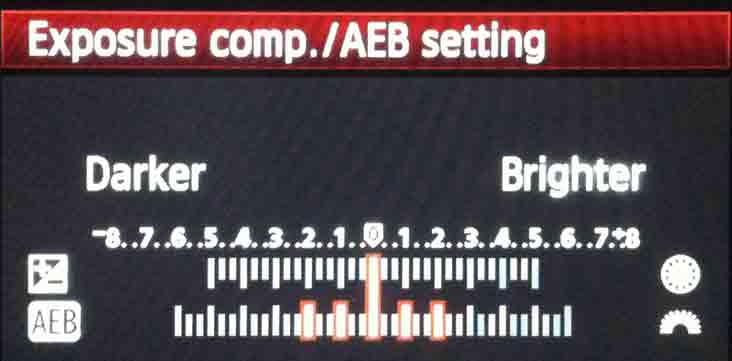
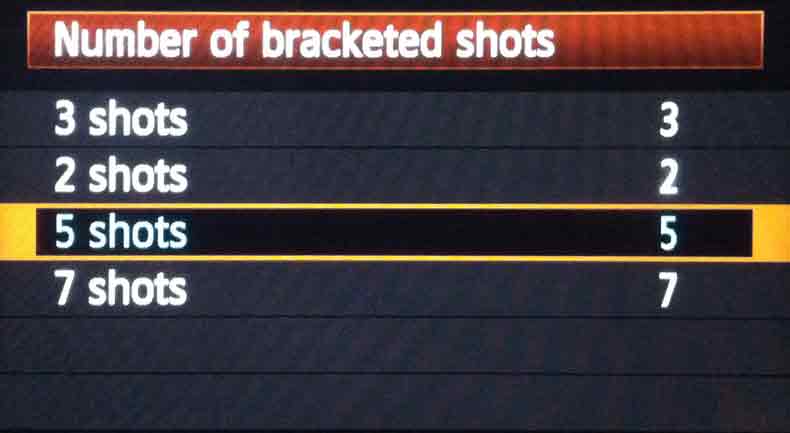
You may have noticed five highlighted exposures in the picture above. Unlike its predecessor, the 5D Mark III allows a choice of 2, 3, 5 or 7 shots within a bracketed set, giving a maximum possible spread of 18 EV. Choosing the number of shots is done in the Custom Functions menu page, where you can also choose to use ½ EV increments rather than 1/3 EV.
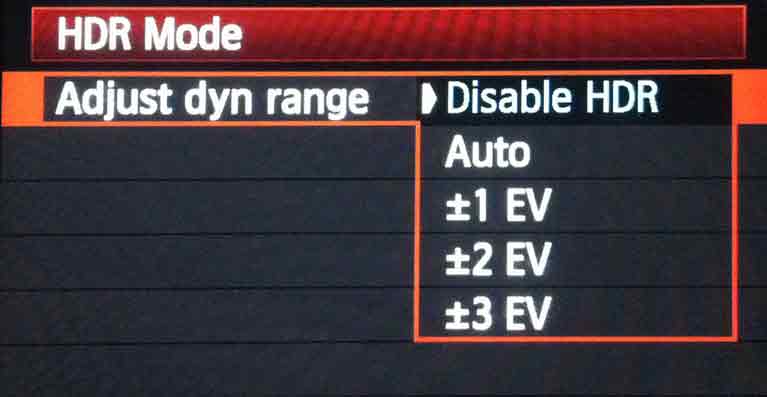
Built-In HDR Mode
Also new in the Mark III is the ability to combine images into one blended HDR photo in camera. This is one of several effects accessible quickly using the new Creative Photo button on the left-rear of the camera, though it can also be found using the normal menu system.
This is separate from the normal AEB mode, with not quite as much flexibility as it offers. HDR mode always combines 3 photos, with a separation of +/- 1, 2 or 3 EV (or you can let the camera choose the separation based on the content of the image).
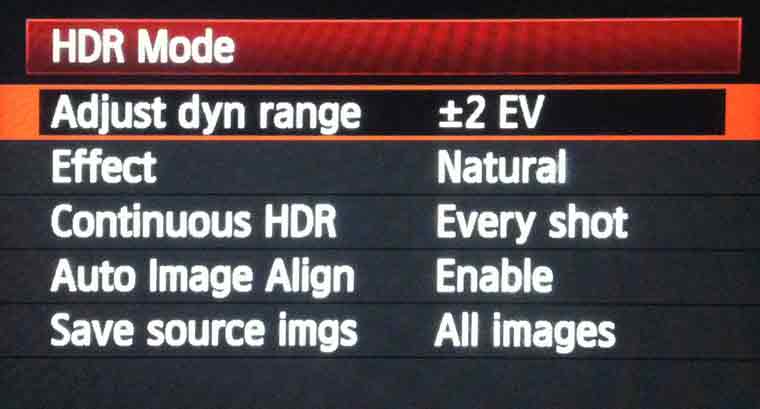
When the shutter button is pressed, three photos are taken in quick succession, then combined immediately and saved as a JPEG image. The result you see depends on the Effect setting, which offers what are effectively 15 different presets, giving you a lot of flexibility in what kind of HDR processing is done.
These presets are divided up into five categories:
- Natural
- Art standard Art vivid
- Art bold
- Art embossed
In each of these categories are three presets, each applying the effect in a more pronounced way than the last. Note though that you have to choose the effect you want before taking the photos. If you want to change the effect, you will need to take another set.
For hand-held shooting, turn on the Auto Image Align option and the camera will also attempt to align your images before merging them. If you have moving people or objects in your photos however, you may notice ghosting in your final image.
One final really nice feature, which particularly distinguishes the Mark III from most other HDR-enabled cameras, is the ability to save not only the final HDR image, but also the source photos. This means that you have the option to process the images again using external software such as Photomatix, if you’re not happy with the final result, or there are issues such as ghosting that require further processing.
Even if you are planning to process all the images with external software, the generated HDR image is still useful as a kind of rough preview of the HDR image that you will end up with.
Fast Facts
Camera dynamic range: 11.7EV AEB Number of shots 2, 3, 5, 7 EV steps Up to ±3EV in 1/3EV steps Max bracketing range 18EV HDR Number of exposures 3 EV steps ±1, 2, 3 Max range 6EV HDR settings 15 presets divided into five categories